Square sail...part 1
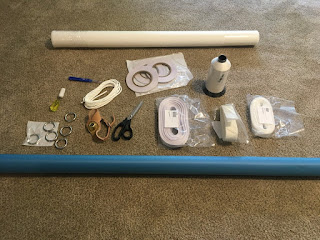
The package from Sailrite arrived:
Will I be able to turn this into a functional square sail? Let’s find out! My neighbor was nice enough to lend me her large double car garage and sewing machine which made this whole process much easier. The first step was to lay out the 1.5 oz rip-stock nylon and mark the dimensions. This was challenging since I didn’t have an oversized T-square or any way to lay out a 90 degree angle. Eventually I used a trick I learned when building foundation forms...measure across opposite corners and keep adjusting until they’re equal. Once I double checked all the dimensions, I grabbed my new shears and cut out the sail.
Next I had to cut out the reinforcement patches from both the rip-stock nylon (blue) and 4 oz Dacron (white). Normally, when you buy a kit from Sailrite, these patches are already cut for you, but they don’t have a kit for a square sail (no big surprise) so I just had to order the raw materials and guess the correct shape and size based on some generic advice (and watching their instructional YouTube videos). I made the largest patch 18 inches and used a template I made to scribe progressively smaller arcs.
Once the patches were all scribed and cut out, I temporarily put each patch assembly together using spray adhesive. I then attached the rings to each assembly using nylon webbing (backed with basting tape) and finally sewed everything together.
The last step for the day was to flip the reinforcement patches over (so the white Dacron is hidden) and carefully place them on the sail fabric using a combination of basting tape and spray adhesive. While the adhesive dries overnight, I will have a beer and let my knees and back recover!


