Anchors ‘aweigh’... or ‘away’ ??
The call “Anchors Aweigh!” is not just the title of the US Naval Academy’s rousing fight song, it’s also the call made when the anchor is actually off the seabed during the raising process. The anchor that came with the boat was a hinged 13 pound Danforth (fluke) style anchor made of galvanized steel which folded flat enough to allow storage in the anchor locker. Unfortunately, the installed bow roller is too small to allow storage of the anchor on the bow roller itself. This means when you want to lower the anchor you have to remove it from the locker, maneuver it under both the furling line and bow pulpit and then over the bow roller before finally grabbing the chain and lowering away. Doing this one-handed with a 13 pound anchor while leaning over a pitching bow is neither easy nor safe, so I ordered this:
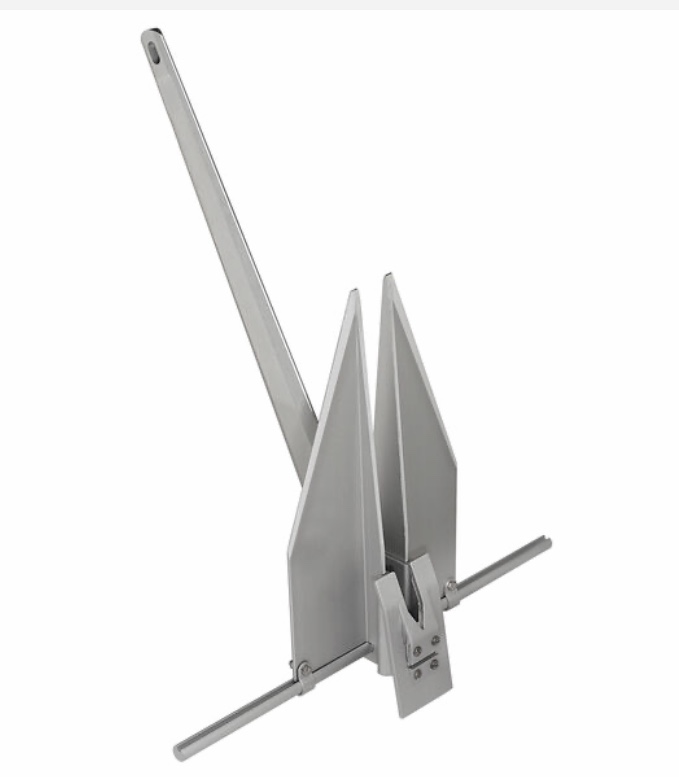
This is a virtually identical anchor, only it’s made out of aluminum-magnesium instead of steel; it has the same dimensions, same holding power and same structural strength, but weighs just six pounds. This will be MUCH easier to deal with! I removed the old anchor, bought a new shackle and attached my shiny new Danforth to the chain end of the anchor rode. To actually ops test it, I picked a relatively calm day with light winds out of the north and sailed up to the south (protected) side of Seward Park, dropped the anchor in 30 feet of water, let out 90 feet of rode and backed down lightly to set it. The crew and I then settled down for an enjoyable lunch as we kept a casual anchor watch to see if the anchor would drag with only 3:1 scope. The charts didn’t show the type of bottom, but I had seen other boats anchor here before, so I assumed it would be good holding ground. Happily, the boat stayed put and I congratulated myself on a job well done; too well done it turns out!
After lunch, I wanted to see if I could bring up the anchor myself without using the motor, so I manually hauled in the rode but couldn’t break it free myself, so I let out some rode, cleated it off, and directed the helmsmen to drive over the anchor slowly in forward gear. As the rode became straight up-and-down, the boat abruptly stopped and the bow dipped sharply; uh-oh, that’s not good. We tried the same process, approaching from three other directions with the same result. We tried bouncing the bow with the rode up-and-down and only succeeded in slightly bending the bow roller. Finally, I had to reluctantly grab the rigging knife, cut the rope, leaving my new anchor and 15 feet of chain at the bottom of Lake Washington...argh! Anchors away indeed!
Okay, time to make some lemonade out of one big lemon.
SEA ANCHOR
I normally use the anchor as simply a lunch hook, so why not just use a sea anchor instead? It won’t keep the boat stationary, but will keep wind drift down to a minimum and allow for a relaxed chance to take a break while underway (like heaving-to) which is the whole point as far as I’m concerned. Here are the advantages of using a sea anchor, as I see them:
1) Can be deployed in any depth of water
2) Lighter and easier to deploy
3) Smaller (folds flat) and easier to store
4) Easier to retrieve
5) Easier on the boat when deployed; no need for a snubber.
I found sea anchors for sale on-line, but I had some scrap material leftover from my sailmaking enterprise, so I figured I’d try to make one myself. First, I had to create a template and had to guess at the appropriate design and size for my boat; I chose a cone-shaped sea anchor with a 28 inch width. Once I had the template made, I laid it out on the scrap 1.5 ounce ripstock nylon cloth and cut it out:


Next, I made some reinforcing patches from 4 ounce Dacron (white) which seemed to be about the right size:

I chose to use a four line bridle attached to a swivel shackle since I read that a potential problem with sea anchors is that they’ll slowly rotate once deployed and eventually tangle the lead lines and collapse. I wasn’t sure the best way for the bridle lines to attach to the sea anchor so I made two attachment points from metal rings (like a sail) and two just from webbing; my hope was that since the rings were heavier than the webbing, it will keep rotation to a minimum. I also include an attachment point at the end of the cone for a trip line since this will make retrieval much easier.

I added Dacron tape along all the edges, basted everything together, and sewed double seams along all edges and attachment points using a zig-zag stitch. Lastly, I folded it over, sewed on the final seams along the length of the cone, turned it inside out and added the bridle lines:

A subsequent sea-trial showed that it worked as expected: easy to deploy, inflates underwater and creates enough drag to slow the drift of the boat downwind and easy to retrieve with the trip line. However, the drag was not substantial enough to actually turn the bow into the wind, so I will make another (50% larger) version and see how that performs.
UPDATE #1: Larger sea anchor with 42” wide throat now fabricated and basted together...a date with the sewing machine is pending.

UPDATE #2: I ordered another aluminum-magnesium fluke-style anchor. While I wait for it to arrive, I needed to add a thimble to the end of the anchor rope that I had to so ingloriously cut. I tried to splice in the thimble at first, but the line was so old and stiff, that proved impossible; I couldn’t extract the rope’s core, no matter how much I pushed, pulled, twisted and probed with my marlinspike. I found this article examining alternatives to splicing; namely, seizing and stitching:
https://www.practical-sailor.com/sails-rigging-deckgear/stitching-instead-of-splicing
In essence, the author concluded that stitching is superior to seizing, and round stitching is superior to lock stitching. Since this thimble connection is so critical, and this is my first time trying something like this, I decided to use the “triple overkill” philosophy and use all three techniques. For half inch rope, the author recommended three inch overlap section to stitch; I doubled that and laid out a six inch section. I started with a timber hitch at the throat to hold the thimble in place, then lock stitched down along the entire length, then round stitched back along the the same length and ended by seizing the end of the whipping twine. I then added two additional seizings, one at the throat (right next to the thimble) and the other at the end of the overlap section. Here is the video tutorial I used to seize the rope and a picture of the final result:
https://www.youtube.com/watch?v=wkcVKJO8SB8
