Regis, I’ll use a lifeline...
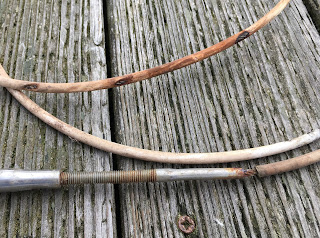
The boat came with stainless steel lifelines, covered with some sort of hard plastic sheathing, which was standard for boats built back in the 80’s. The plastic protects your hands (and the sails & rigging) from the meat hooks that develop over time as the individual strands of the stainless steel wire rope break. The downside to this covering is that it hides these breaks so a visual inspection gives you very little idea of the wire’s integrity. I had already encountered a couple meat hooks where the covering had worn away, exposing the wire rope (“Ouch!...what was that? Hey, why is my hand bleeding?”) and rust was seeping through the numerous cracks in the plastic covering; it was time to replace the lifelines.
Since I have plans to replace the lower shrouds (also made of stainless steel wire) with single-braid Dyneema rope, I figured replacing the lifelines with this super-strong fiber would give me a chance now to get familiar with the tools and techniques used when working with Dyneema. [BTW...many of the articles, videos, etc. I referenced are listed on the WEBLINKS page of this blog]. There are numerous advantages to using Dyneema over stainless steel wire: it’s stronger, it’s lighter, it’s more flexible, it doesn’t require swaging, it’s easier to inspect and when it does start to degrade, it’s readily apparent and won’t slice your hand open.
I started by ordering enough 1/4” single-braid (12 strand) Dyneema (Amsteel) rope (tensile strength = 8,600#) to span both lifelines, both gates, plus extra for splices and a few more feet just for momma. I also ordered similar 1/8” rope to use as lashings. Colligo sells special (and expensive) fittings for this sort of job but I just picked up some stainless steel thimbles for 1/4” line along with a couple new pelican hooks that are specially designed for use with Dyneema.
You connect these components together using splices instead of swaged fittings; specifically, the Brummel locking splice. There are different versions of this splice, but the easiest to fabricate is when you have access to both ends of the lines. While I was home in a nice warm & dry environment I took the opportunity to cut the Dyneema into four appropriately sized pieces (two for the port & starboard lifelines and two for the port & starboard gates) and attempt my first Brummel splice. As expected, it was slow going, with constant pausing and rewinding of the instructional video, but after the first splice, the others went much faster. Here is the result of my first afternoon getting acquainted with this amazing stuff:
I spliced the thimbles into the ends of each lifeline and spliced in a loop for each gate. The latter will be attached to the former with a luggage tag hitch. Once I got to the boat, I used my Dremel tool to smooth the edges of all the stanchion holes to hopefully eliminate once source of potential chafe.
I fed the lifeline through the aft stanchion and then ran it forward through the successive stanchions until the thimble bottomed out on the aft stanchion. Now I did the more difficult version of the Brummel locking splice; the one with one end fixed. Here is the result once I’d inserted the thimble:
Next, I spliced an eye in the end of the 1/8” line and used it to lash this thimble to the bow pulpit. Once the lifeline was tensioned, I secured the lashing with a series of half-hitches as recommended by Colligo
Lastly, I spliced the pelican latch onto the other end of the gate. Although I dry fit the gate before choosing the spot on the line to splice, once I’d buried the tail the gate was too short so I had to add a shackle to make it the right length. I’m hopeful the line will eventually stretch a bit, allowing me to remove the shackle. Here are both ends of the gate:
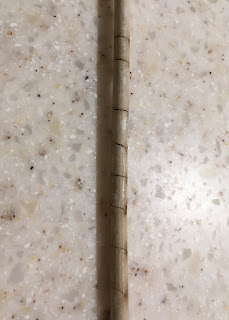
I feel much better now that the lifelines have been replaced, particularly after removing the old lifeline and finding this hiding beneath the PVC cover pipe:
 |
| Adequate clearance between yard-spar, anchor locker door and lifeline |


