Posts

Stripping her down...
Image
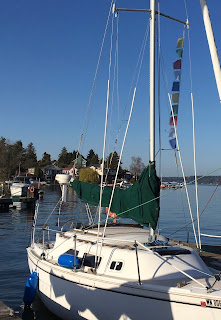
Now that I’ve established she can sail adequately with just the genoa, now is as good a time as any to remove the mainsail and the boom.  I also was able to sell the radar to another boater who will make much better use of it than I; this uncluttered things further.  You can see in these Before-After pictures that she does look a bit stripped down now. BEFORE AFTER The mainsail and boom together weighed about 25 pounds and the radar transmitter dome also weighed about 25 pounds; they both were about 90 inches above the waterline.  The square sail will be hoisted 13 feet above the deck (230 inches above the waterline) on a yard-spar that will weigh about 20 pounds.  If you do the moment arm calculations, you’ll find that these offset one another almost exactly (at all angles of heel); one less thing to worry about! Now I have a spare halyard that can be used to hoist the square sail and a blank canvas to start adding to...running backstay, braces, cr...

Thou shalt single-hand...

Image
With our social distancing directives, if I want to go sailing it needs to be done solo.  Single-handing a 26 foot sailboat is certainly doable, but being cautious, conservative and prepared are essential.  The big worry:  what happens if you fall overboard?  If the boat is trimmed up and sailing or motoring along, you may never get back aboard before hypothermia sets in. Por otro parte , since my design goal is to transform her into a square-rigged sloop that can be single-handed, the more I go out sailing alone, the more likely the design will evolve in that direction. Today was a perfect day for a conservative, cautious day of single-hand sailing; the weather was gorgeous which meant others would be out on the water, and the winds weren’t forecast to get above 15 knots. Looking south towards Mount Rainier I started sailing north towards Seward Park with just the genoa.  I had always assumed she was a leeward slug because of her shallow keel and ligh...

Martha meets MacGyver...

Image
Just about everyone has heard of Martha Stewart, the high priestess of cooking, fashion and home decorating, but for those of you not raised during a Reagan presidency, let me explain:  MacGyver was the title character of a popular 1980’s TV series known for his improvisational ability to create just about anything out of paper clips, matches, duct tape and his Swiss Army knife. I am indebted to both Martha and MacGyver for my latest effort.  I needed to make a draft version of the crossjack (whisker pole) I’ll be using for the square sail so I can test out the range of motion to see how it interacts (or interferes) with the boat’s existing rigging.  I knew the length of the crossjack needed to be about  80-84” long and I happened to inherit a Martha Stewart antique bronze, three-piece adjustable curtain rod kit.  If you’ve ever installed one of these, you’ll know that two of the aluminum tubes are about one inch in diameter and then there’s a smaller diameter...

Rule #1: Don’t be stupid...

Image
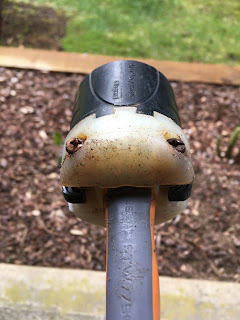
Yes, rule #1 is “ don’t be stupid ” and rule #2 is “if at anytime you are frustrated or impatient...stop, then refer to rule #1 ”.  Boy, I really wish I had followed the rules. The boat came with a 25 foot shore power cord, which seemed to work fine, but the male receptacle that plugs into the dock’s electrical outlet was covered by wrap upon wrap of electrical tape.  This usually means that something unpleasant lurks under all those layers of tape, so being a responsible boat owner, I investigated.  First, I checked the continuity of all they wires in the cable; all three showed zero ohms of resistance...great so far.  Next, I carefully cut away all the tape, ensuring I didn’t damage the underlying insulation and this is what I found: Well, the white clamp that holds the cable to the plug was kind of rusty, but it seemed secure...maybe there’s something in the plug itself that is defective?  Well, let’s take the clamp off then and see what we find. ...

Our first date...

Image
Today I felt confident enough with the engine, rigging and sails to take her out for a short single-handed cruise.  To get to this point, I’ve been fixing a number of niggling annoyances that I’ve noted as I’ve gotten to know her.  The main halyard was binding and not traveling freely and I discovered that it and the jib halyard were crossed near the top of mast.  After lowering the foresail I was able to uncross the halyards and re-raise the genoa.  I also replaced the block at the base of the mast to reduce friction; this should allow me to raise the mainsail from the safety of the cockpit. The installation manual for the furling unit recommended 1/4” braided rope for the furling line.  Having this line break can cause chaos since the foresail will deploy whether you want it to or not.  Should this happen while you’re away from the boat with high winds, the foresail will unfurl and most likely tear itself to shreds, hopefully before your docklines or de...

Getting to know her...

Image
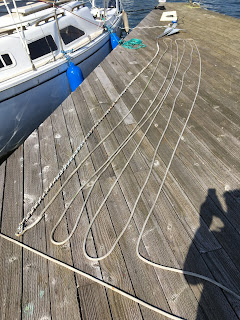
The past couple days I’ve opened up as many access panels as possible to inspect, ponder, plan, but mostly to CLEAN!  Yes, she has some areas that are quite filthy but I am slowly rectifying that.  There are also gobs of little projects, many of which are just not photo-worthy, but here are a few things I did this week. I wanted to clean out the anchor locker and to do that of course, the anchor, chain and rope needed to be removed.  The previous owner wasn’t certain how long the anchor rode was, so I took this chance to actually measure it, inspect everything and ensure the connecting shackles were tight and secure.  The rode includes 15 feet of chain and 110 feet of rope for a total of 125 feet.  Now I know that I can comfortably anchor in 25 feet of water with a 5:1 scope. I also removed the cushioned covers from the cockpit locker seat tops.  They may be padded, but the core is plywood (unglassed) and felt heavy and waterlogged; this prevents t...

Homeward bound...

Image
When you buy a boat, the logistics of getting the boat from her old slip to her new slip can be a bit complicated.  You need to either leave your car at the new slip, then somehow get to the old slip to begin the journey, or vice versus.  In this case, since there were two of us making the journey, and the distance between our start and end points was quite substantial, this created a double wrinkle.  Thankfully, my neighbor was kind enough to drive me up to Everett (not a short trip), which would allow me to make our day long sailing journey south and then to drive the old owner back to his car once we had the boat tied up at her new home. Originally, we were going to try and do this over the weekend, but the marine forecast dictated a delay until Monday, when the small craft advisory expired and the winds were more manageable.  On Sunday, NOAA updated their forecast to show winds up to 25 knots and wave heights up to four feet on Monday, so we agreed to delay th...

Prepping for passage...

Image
Once I make final payment on the boat and have the title signed over, she will need to be moved to her new home.  The previous owner has agreed to accompany me on this repositioning cruise for which I am most grateful; going through the Ballard Locks single-handed is not something I want to attempt until I’m thoroughly familiar with the boat.  It will be a long day...we’ll have about 12 hours of daylight and will need every bit of it!  Here is a nav planning document I put together for the passage: Everett-Lake Washington passage planner Aside  from getting through the locks, and making sure we have enough gas onboard to motor the entire distance (because you just know the wind will be in our face the whole way!), the other big issue (in a sailboat) is getting under all the bridges in the ship canal and Lake Washington; it’s imperative to know the height of the mast above the waterline.  Now, one can easily google this number, but do you really want to...

Finding a boat...

Image
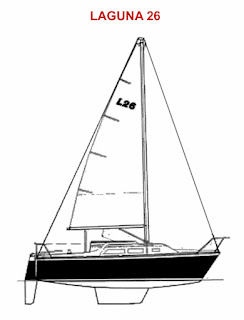
I had a few unique requirements for the boat I wanted to purchase which I could then modify for this unconventional project: —LOA (overall length) less than 27 feet (to fit comfortably into my slip and to minimize hull drag) —Maximum LWL (max waterline length — for the highest hull speed possible) —Maximum beam (>8.5 feet) for easy storage of the yard-spar when lowered and comfort belowdecks —Minimum displacement (<4,000#) to minimize hull drag —Fiberglass hull (my romantic notions of yesteryear sailing do not extend to wooden hulls) —A deck-stepped mast hinged at the base (to allow raising/lowering the mast without a crane) —Shrouds swept aft of abeam (to give the yard-spar some room to swing when raised) —Minimal number (preferably zero!) of thru-hulls below the waterline —Standup headroom (for comfort when glamping on the water) Just as importantly, what I did NOT require was a blue-water boat that sailed well upwind since I plan to sail exclusively in protected co...