Posts

Watt a boat ...

Image
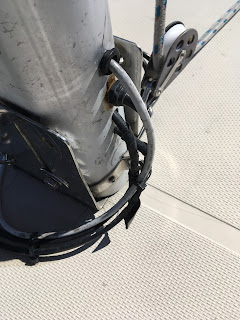
 This is something I probably should have addressed sooner; namely, the electrical system.  It’s kind of a mess which I guess is inevitable in a 35+ year old boat.  The original bare-bones system has been added to and modified over the years so that now it’s a tangle of chaotic wiring with a schematic that makes little sense and some workmanship best described as ‘questionable’. Yes, those are wire nuts you see buried in that rat’s nest (wire nuts should NEVER be used on a boat) but that is not the scariest thing I discovered. When I did the pre-purchase survey, I was pleasantly surprised to see that the boat came with a functioning 1500W inverter; having access to AC power when away from the dock is always a nice option to have.  When I started my investigation of this particular circuit, I noted that the inverter was hot-wired to the battery and happy to see a fairly short wire run of beefy one gauge cable connecting the two, meaning both the ampacity and the volta...

Projects...

Image
 I’ve been delaying the last major piece of brightwork refinishing because the boat will cease to be a functioning sailboat; I’m referring to the teak baseplate underneath each winch. To pull each piece off means the winches and cam cleats have to be removed: Once I disassembled the winch (taking care with the spring clip!) and removed the five mounting bolts (with a little help from a friend), I had to remove the fasteners holding the baseplate to the fiberglass, which were buried under bung plugs, so of course those had to be drilled out first.  When I finally got the baseplate removed, it was not surprising to see all the dirt and crud underneath.  Also not totally surprising: finding additional holes in the fiberglass leftover from some previous piece of deck hardware; I believe I have found the source of the quarter berth water leak!  Here is a picture after the area was cleaned up and the extra holes filled with epoxy: I cleaned, sanded, stained and epoxied the...

...or maybe not...

Image
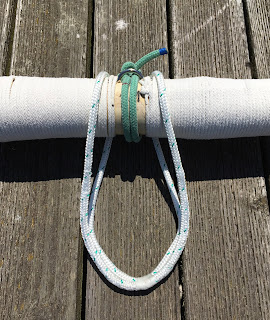
I took her out again rigged square without the mast retention loop (see previous post); this time with moderate winds and more boats out on the lake.  As I was hoisting the yard-spar, the boat got rolling a bit due to a passing powerboat and the yard-spar really started swinging back and forth. The braces were necessarily slack as I was hauling on the halyard so the dampening effect wasn’t as great as desired.  Once the sail was raised with the halyard cleated off I got back to the helm and tightened the braces, and all was well, but single-handing in these conditions is not ideal.  In the future, I will want another crew member along at the helm to monitor the braces as I hoist the sail.   So, it looks like I’ll have two configuration options: the first, for calmer conditions, will exclude the mast retention loop; the second, for single-handing and/or more challenging conditions, will include the mast retention loop.  [NOTE: this problem was solved by install...

Sea trial breakthrough...

Image
...I think!  Took her out again rigged with the square sail, but this time, I left out the mast retention loop which held the yard-spar against the mast with just enough slack to allow the yard-spar to slide up and down the mast.   Mast retention loop installed Mast retention loop uninstalled Removing this from the rigging equation did a number of things: 1) The yard-spar can now be raised above the level of the spreaders (GOOD) 2) The yard-spar can be lowered below the mast-mounted winch, perhaps all the way down to the level of the lifelines.  This will allow the square sail to be rigged and stowed while also allowing the boat to sail fore-and-aft rigged with the genoa powering the boat; tacking is now possible since the sheets will no longer get hung up on the yard-spar during the maneuver.  This will necessitate the installation of additional rings or U-bolts lower down on the mast to store the crossjacks out of the way, but that is certainly doable. (GOOD) 3) Th...

Brightwork experiment ...

Image
I am slowly removing, refinishing and reinstalling all the pieces of wooden brightwork on the boat.  The latest piece was not just a refinish project but also a repair; the hatch cover for the starboard wet locker.  This cover has a fitting for the auto-helm and at some point in the past when it was installed (or reinstalled), the teak hatch cover had cracked completely in two pieces lengthwise.  It was temporarily repaired by screwing in a piece of steel strapping to both pieces on the backside, but it was flimsy and I wanted to do something more permanent.   Once I had sanded, prepped and stained both pieces, I attached them together along the seam with some JB Weld epoxy and after that dried, I laid a piece of biaxial FRP cloth across the seam on the backside and coated the entire piece with West System 105/205 epoxy.  The result was a much sturdier repair. Back view Front view With the hardware installed; you can see the fitting for the autohelm on the right...

Version 1.1 ...

Image
I bought a pair of the biggest, beefiest screw eyes I could find at Lowe’s and installed one in each end of the yard-spar.  This added a few inches to the length of the yard-spar; the head of the sail now spans 88” instead of 84” as before: I took her out single-handed with the upgraded yard-spar and sure enough, the profile of the head of the sail improved quite a bit: Yes, that looks much better, and the sail is more effective at capturing the wind.  Today the breeze was moderate, perhaps 5-10 knots, gusting up to 12 to 14 knots and I wanted to see if I could convert the boat from fore-and-aft rigged to square rigged in those conditions, so I actually started sailing upwind with the square sail stowed and the genoa unfurled.   It all seemed fine until the first tack, when the working sheet got hung up on the yard-spar during the maneuver; this caused a bit of chaos and some entertainment for anyone on shore watching me bumbling around trying to sort everything out, whic...

Maiden voyage...

Image
The day has arrived.  It’s time to see if this wacky idea will actually work out on the water.  I specifically chose a light wind day for the first sea trial and a friend from RSC was available to come along and help out.  After yesterday’s dry run at the dock, I modified the rigging procedure; today, I followed the revised procedure and double checked that all lines ran where they wouldn’t snag or grab anything when the sail was hoisted. Here is a picture of the port side clew.  You can see the attachment of the foreguy, crossjack and sheet. Thankfully, my first mate is a competent and experienced sailor, so it didn’t take much of a crew briefing to explain the very unconventional rigging setup and the plan for the day’s short cruise.  We shoved off and motored upwind for a bit, then turned downwind and hoisted the sail.  The crossjacks can snag on the forward lifelines but that can be managed by keeping the foreguys tight until the yard-spar is halfway up...

The first hoist...

Image
Now that I have all the standing and running rigging set, and the square sail fabricated, it is time to raise the sail and see if the yard-spar, crossjacks, retention loop, running backstay, braces, sheets, foreguys, etc. all work together the way I envisioned.  I thought through the rigging procedure and made a draft in the design document, which you can find  HERE Following my draft procedure, I started rigging the square sail and got to the place where I thought the sail was ready to be hoisted: Now, the moment of truth...I started hauling on the halyard, and...oops...the sheets need to go outside ALL of the lifelines before running to the jib car.  Okay, lower back down to the stowed position and reroute the sheets.  Second attempt:  Success! Everything worked the way I imagined it would.  I was able to control the yard-spar with the braces and swing it around the mast to capture the wind at more downwind angles; control the foot of the sail with the sh...

Rails and tracks...

Image
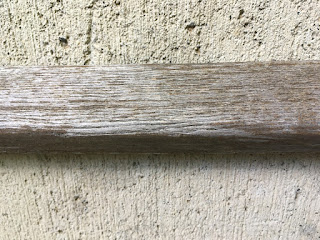
While waiting for a shipment from Rig-rite, I tackled some projects that needed attention.  I traced a water leak by the nav desk to the starboard slide retention rail for the cabin top.  I was 90% sure the water was getting in through one of the fastener holes, and when I removed the slide rail, sure enough, there was an extra unsealed hole that had been inadvertently drilled when the rail was last installed.  I reamed out the hole and sealed it with epoxy and then got to work on refinishing the teak rail itself.  It definitely needed some attention: I started with a wood file, then sanded with 100 grit paper and finished with 220 grit.  After wiping with mineral spirits and letting dry, I brushed on a fast drying oil-based stain, left it on for 2 minutes, and then wiped off the excess: Normally, when you think about sealing and preserving brightwork on a boat, you traditionally think “varnish”, but I don’t want to spend a week brushing on varnish, letting it d...

Square sail...part 2

Image
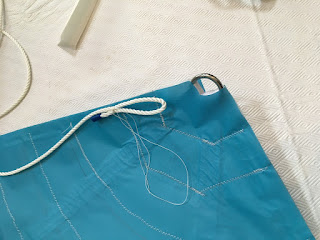
The next morning, after partaking of coffee and Advil, it was time to sew the reinforcement patches to the sail itself.  This was challenging due to both my poor sewing skills and to the fact that the sewing machine had a quite narrow throat.  I started with the head of the sail, since it had the most patches and the largest (and most difficult) patch to sew.   I rolled the sail material up which allowed me to attack each patch from both sides.  It wasn’t pretty, but once I had the head patches sewn in place, I sewed the top and bottom sail sections together (after first basting them together) and then worked on the two bottom (foot) patches which were easier.  Next it was time to reinforce each edge.  Jeff from Sailrite recommended I reinforce the top edge with some nylon rope before covering with Dacron tape, so that’s what I did: The other edges got just pre-folded Dacron tape.  It was attached first with basting tape and then sewn in place...